Analytics

Sunday, May 11, 2014

From Pallet to Wall Planters

Last November I just happen to be in a local store and I eyed a cute little pallet.  I had no idea what I was going to do with it, but I knew I had to have it.  So, I asked if I could have it and they let me take it home:-)  Now, 6 months later, I finally came up with a project for the pallet.  It just so happens I have a blank wall next to my garage that needs something, so I thought "why not turn that pallet into wall planters".   The wall looked empty and blah before but now I think it looks pretty good.  Here is my wall before: 
This is my wall after I hung my planters: 
Much better, I just wish I had another small pallet to make more:-)) 

You will need:
1.  A small pallet
2.  A hammer
3.  Something to pry out the nails
4.  Scrap wood that you have handy (I used cedar shakes)
5.  A few extra nails or screws


This is how I did it:

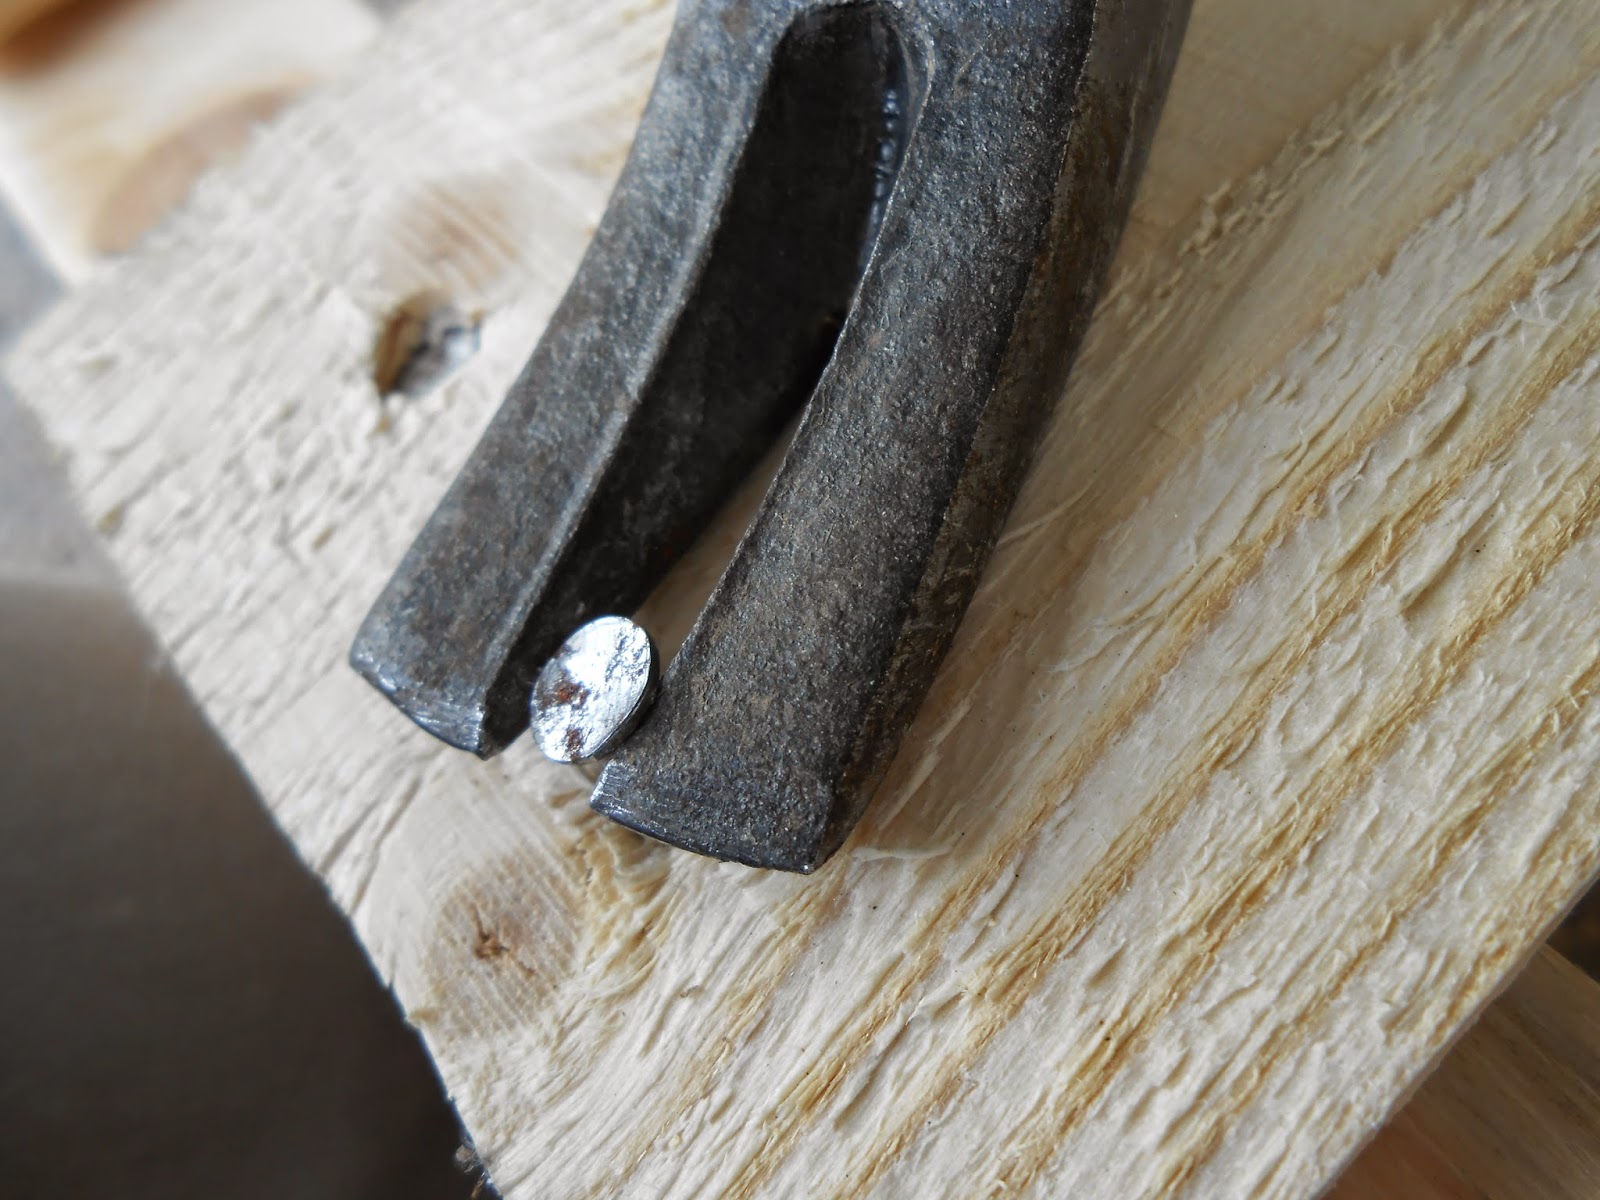
1.  First, pry out the nails (gently) and remove the middle boards.  I found it easiest to use a mini pry bar to slip under the wood and pry the nail up just enough to be able to remove it with a hammer like this:

2.  Remove both boards and the nails you pulled out and set them aside.  I reused the nails that came out of the pallet.
3.  Now, reattach them so that they are next to the other boards on the pallet like this:
4.  Now cut the 2x4's right up against the boards you nailed into place-you will have 6 cuts to remove the excess wood.
5.  This is what you should end up with:
6.  Take the scrap wood (measure it if necessary) and nail to the bottom.  Cedar shakes worked great-they were almost exactly the size I needed.  I only had to trim them up a little bit.
Here they are before being painted:
7.  Paint them-I used paint and primer in one and I coated them 3 times to be safe.


All painted and ready to hang:-))
Here is another pic of them after they are hung but before I planted them (note: before I planted them I lined them with landscape fabric to keep the dirt in):
Here they are again:
This project was really easy, I am a total novice when it comes to working with wood and tools.  I hope you try this out, it would work on a larger pallet-you would just have bigger planter boxes.

So, until next time-Happy Planting!

Rhonda


Monday, May 5, 2014

Kitty Litter Jug Equals Free Plant Tags

Herbs ready to sell, but only a few are tagged

The subject of this post today was based entirely on need-my need for a bunch of plant tags without spending any money.  I had no popsicle sticks or mini blinds available so I looked to my recycling bin and there it was-an empty cat litter jug. 

Here is what you need:
1.  Empty cat litter container.
2.  Pair of scissors.
3.  Sharpies or a pencil to mark cuts.
4.  A plant tag to use as a template (optional for talented people:-))


Here are the steps to make your plant tags:
1.  Remove the label.
2.  Remove the very top like this:
3.  Cut down the sides:
4.  Cut bottom off (where it is curved).
5.  Cut down all corners so that you have "sheets"-you want to save all available flat pieces to use.
6.  Use your template to mark the flat sheets with a sharpie or pencil (after I did this I wish I would have used pencil-Sharpies and I do not get along).
A tag I had that I used as a template.
Begin marking lines for cutting.
One of the sheets completely marked.

7.  Begin cutting the tags out-make sure to use sharp scissors (try to stay on the lines:-))
8.  Here are all the tags I cut out-there were 42 tags from 1 jug.  I also used alcohol to get the sharpie off of some of them because I am messy,  next time I will use a pencil to mark the outlines.  The pile above the tags is all that I had left from the jug.  I used ever flat surface available.
Here they are all cleaned up and in their pots. 
So, there you are, a way to save the planet and save money at the same time!  I hope you enjoy this week's post!  Well, I am off to make another 300, so until next time-

Happy Planting!

Rhonda


Sunday, April 27, 2014

Propagate Hostas without Breaking Your Back!


Hosta "Lakeside Shore Captain"
There are two types of gardeners in the world: clumpers and splitters.  I admit it-I am a clumper.  I cringe at the idea of cutting my babies up into pieces.  I would rather leave them alone so they can get  big.  Wait, not big-huge.  I want huge Hostas.  Digging them up and dividing them can set them back and, to be honest, I do not like doing that because it takes some varieties forever to reach a good size.  A solution I came up with is minimally invasive, and it does not set my Hosta back like digging up the entire clump does. This is perfect if you want to share a small piece or if you need a few eyes for a project.  You can take off more than I have shown, I just prefer to keep it to a minimum.  Just a note: I do this in Spring before the Hostas leaf out so I can see what I am doing, but you can do it at any time of year.

Here is what you need:

1.  A  nice clump of Hosta.

2.  Shovel that is cleaned and sanitized.  I recommend this due to Hosta Virus X a disease that affects and spreads among Hosta.  (I recommend you read about HVX at this link: http://www.inthecountrygardenandgifts.com/articles/hosta_virus_x.php)

3.  Something to plant your eyes in.

Here are the steps:

1.  Find a clump of Hosta you want to propagate,  I chose is one:
Hosta emerging in spring

2.  Find an eye or set of eyes toward the outer edge and use your finger to clear a spot between the eyes like this:


 3.  Take your shovel and place it in the spot you marked:
Place shovel between Hosta pips

 4.  Push down on the shovel and cut through the Hosta to release the eyes: 
Use shovel to cut between the Hosta pips

5.  Move the shovel around the eyes you are removing to cut through and loosen them.  Make sure to be far enough out to get some roots:
Step on the shovel to cut through

 6.  When you have cut around it gently lift it with the shovel:
Lift the Hosta piece out gently


7.  Or your Hand if it's easier:-)
Remove the piece of Hosta
 

8.  Replace dirt that came out and pack it gently: 

9.  Pot the eyes up for when you need them-keep them well watered until you find them a new home.
Hosta division
Potted up Hosta divisions
I hope you find this post helpful!  Feel free to leave me comment on anything you would like.
Until next time-Happy Planting!

Rhonda