 |
| Herbs I started from seed indoors |
 |
| Herbs I started from seed indoors |
So here is the list of the mistakes I made when I first started growing seeds inside:
1. Wrong soil-this is probably the TOP issue there is. Not any old soil will do for indoor seed starting. Some are too heavy, some are too light, and most aren't sterile. You need to use a sterile soil-less mix to be successful. Look at the seed starting mixes used by the growers-they are usually a peat or coir based mix without any added compost or soil. Read the "ingredients" when purchasing and avoid compost, soil, humus etc. in the mix. I prefer (and have had wonderful results) using Pro-Mix growing mix. Seed starting soils that are not sterile can harbor insects and disease which will be hard to control once they start.
 |
| My preferred seeds starting mix by Pro-Mix |
2. An important issue that is easily overlooked is the issue of watering. ALWAYS bottom water-by this I mean place water in a shallow container and then set your pots or trays in the water and allow the water to be absorbed into the soil. When the soil becomes damp remove the pots or trays from the water and let drain so they do not sit in water. Bottom watering helps in controlling fungus/disease related issues like damping off and mold. Bottom watering also helps to control over-watering which also leads to disease issues.
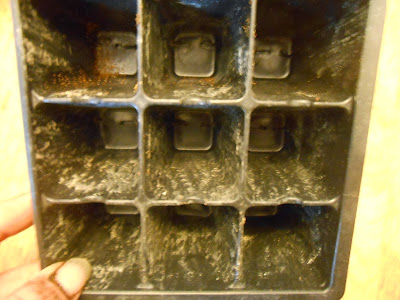
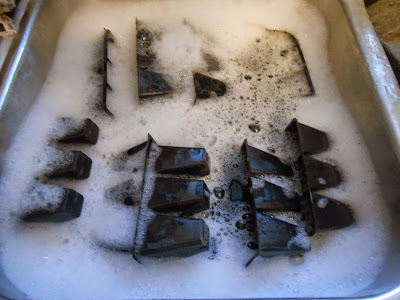
3. Using the wrong pots/containers or unsterilized pots/containers can cause serious issues for gardeners. These issues are disease related. Molds and fungus just love decaying material and when you use items like eggshells and paper that decompose you are inviting disease issues. If you want to recycle use plastic containers from yogurt etc. for seed starting just make sure to clean them well with a bleach solution. I personally just keep recycling my pots from previous years-washing them thoroughly before each use. Also-I have never had any luck with peat pots or peat pellets. They dry out too quickly and also can act as a "wick" pulling moisture from seedlings because of too much surface exposed to the air.
 |
| Dirty seed starter cell from last year that needs cleaned |
 |
| Cleaning and sterilizing plastic pots from last year |
 |
| Clean and sanitizing seed starting cell packs from last year |
4. Seedlings need light-not a little but a LOT. Not enough light causes weak, lanky and leaning seedlings. Make sure you give your seedlings plenty of light whether it is artificial or natural. I prefer to use artificial light in the form of fluorescent shop lights-no need to spend money for fancy grow lights unless that is what you want to do. I also reflect as much of the light back on to the plants as possible. This also helps to prevent legginess and keeps the plants healthy and bushy. My lighting system works well enough and provides enough light and warmth to keep my Agave and Sempervivums looking good all winter long. I leave my lights on my plants between 12-15 hours a day to make sure they receive enough light to grow big and strong.
 |
| One of the fluorescent light fixtures I use |
 |
| For plants use 1 warm and 1 cool fluorescent lights |
 |
| For plants use 1 warm and 1 cool fluorescent lights |
 |
| Reflecting the light helps keep plants bushy and prevents leaning |
5. Fertilizing. Yes that can be an issue. You do not need a seed starting mix with fertilizer-seedlings do not need fertilizer until they have their second set of true leaves-not before. You don't feed your children if they aren't hungry so don't feed your seedlings until they need it. Over fertilizing can build up in the soil, burn the seedlings or even cause too much growth. More is not better! Too little fertilizer can cause a host of problems such as discoloring of leaves, leaf curl, spotting etc. depending on the deficiency. My recommendation is to apply a balanced, water soluble fertilizer at half the recommended strength every third watering.
6. Planting depth. Planting your seeds too deep or not planting them deep enough can cause issues. Some very small seeds need light to germinate while others might need dark. Issues related to planting depth can be: lack of germination, root development issues, and seed coat not falling off when seedling emerges. When in doubt plant your seeds no deeper than their diameter.
7. Not providing air circulation. Another big issue. Lack of air circulation can lead to disease issues, fungus gnats, and weak seedlings. Run a fan on your seedlings for at least a few hours a day to help prevent these issues.
8. Starting your seeds too early can also be an issue. Sometimes we get so excited at the thought of Spring that we start our seeds too early. If you have the space to take care of them as they get large then by all means start them whenever but if you have limited space and resources then don't start them too early. The general rule is to start most seeds 4-6 weeks before the last frost date for your area.
 |
| Basil started too early-had to harvest because it got too big |
9. Sowing too much (more than you need). Boy does this happen. Sure that entire package of Tomato seeds doesn't look like a lot but when they start growing look out! If 50 seeds are in the pack and you plant them all and you have 50 percent germination you will have 25 tomato plants. Unless you are a farmer you don't need that many. Plus, they will take up a lot of room in your house. All I am saying is take it easy and only plant as many as you need and save or trade the rest of the seeds.
10. Not paying attention. You can't plant seeds and walk away. They are like children and need constant supervision in order to thrive. Preventing pest and disease issues requires constant monitoring. Once you see one plant keel over or one fungus gnat flying around you need to act quickly and the only way to do that is if you monitor. Keep an eye on things so you know when they need watered, fed or isolated.
 |
| Seedlings under lights |
If you want to be successful at indoor seed starting remember to avoid making these mistakes that I have learned along the way. If you have any questions or comments feel free to leave them below.
Happy Planting!
Rhonda


