Did you know that succulents are the easiest plants to propagate? It is true! You can propagate them many ways but I mostly propagate them by either removing the "chicks" or by leaves that have fallen off. You let them dry for a week or so then place them in a well drained soil and voila! you have baby plants. It does take a little bit of time for them to reach a large size-especially from a leaf. But I believe that it is well worth the wait. Heck-if I can wait three years for seeds to germinate I can definitely handle waiting for a succulent to grow to a good size. Of the succulents the easiest to propagate is the famous hens and chicks or Sempervivums. You pop the babies off and plop them in soil and you have a good size plant in no time. When I propagate my hens and chicks I usually do it in the fall or winter when I have a little time on my hands. That means I have them inside-even the hardy Sempervivums (they will grow inside!) I collect little chicks off of plants that I have or someone gives me and I set them in a tray of sandy soil. I do this all summer and by the time it gets cold I have a few to bring inside with me to grow. Here are some I will propagate over the fall/winter:
My system is relatively easy-you only need a few things:
1. Pots or seed starting trays
2. Some sandy/fast draining soil-make sure it is sterile (you do not want any bug or disease issues)
3. Succulents
4. Plenty of light-at least 6 hours (just a note-I do not have a lot of direct sun so I use shop lights with T8 bulbs and have excellent results. There is no need for fancy grow lights)
5. Rooting hormone (not necessary but some people like to use it)
That is it. So here are the steps I take to root these babies:
1. Find your trays or pots (make sure they are clean) and fill them with the sandy/well draining potting soil (that is sterile).
2. Dip the bottom of your succulent in a little water (this helps it to make contact with the soil)
3. Just lay the chick onto the soil-mine has his "cord" so that is inserted into the soil.
4. If you have ones that have dead leaves around the base of the plant-pull them off:
All clean:-))
In his new home:
I even have a few that almost died-I remove all the dead parts and stick them in the soil too. As long as there is a green spot on it I try to save it:-))
Here is a tray that I have planted:
5. If you have any leaves that have broken or fallen off all you need to do is let the end dry up for a few days then when it is dried up just lay it on top of the soil. It will root and form a plant.
Here are my cuttings and leaves that I am rooting:
I will mist the soil when it gets dry-never soak the soil. It can cause the plants to rot instead of root. I will also run a fan a couple hours a day to keep the air circulating and to keep any issues of bugs or diseases at bay. The fluorescent lights are on for 15-16 hours a day-mostly because I have other plants under them. Succulents do need at least 6 hours of light in order to "survive" and grow. By spring most of them will be ready to pot up into a bigger container or out in the garden.
This is such an easy way to get more plants that I do it every year. Doing this in fall/winter works best for me because I have time in the fall/winter to take better care of them. In the summer I have a tendency to forget about the little things. Doing it when it is cold also gives me an excuse to "garden" inside. When I don't have any "dirt" to play in I get a little restless so this ends up helping me with that. It also keeps the "winter blahs" at bay.
Just remember-don't be afraid to propagate those succulents! You will find out like I did that they are the easiest plant to propagate from cuttings. They are also extremely hard to kill. All you need to remember is that water is the enemy-too much will kill them. If you are not sure when to water just remember to let them completely dry out. That is all there is to it. I hope you try growing your own and if you have any questions feel free to leave a comment below. So-until next time
Happy Planting!
Rhonda
Analytics
Thursday, November 20, 2014
Sunday, November 16, 2014
DIY Outdoor Snowman using Plastic Nursery Pots
Have I told you how much I love repurposing things? Well, I do. I feel that it is fun and interesting to come up with ways to reuse items that might normally be discarded. So last week I challenged myself to reuse some of those plastic nursery pots I have stored under my deck. Of course, I had to be "seasonal" so I created a snowman with them. You could make something besides a snowman-perhaps a Santa or a Christmas tree. Here is a picture of my completed project:
Just like most of my projects this one is super easy and cheap:-)) For this you will need:
1. 3 nursery pots in different sizes
2. Spray paint-white and black (I use Rustoleum 2 in 1 with primer)
3. A good weather resistant glue (I used Gorilla Glue)
4. Some tape-I used duct tape
5. 2 sticks for arms
6. A hat and scarf
7. A few landscape staples
Begin by gluing your pots together upside down-start with the largest on the bottom, medium in the middle and smallest on top. Follow the manufacturer's directions for your glue.
Let the glue set for the recommended amount of time. I weighted mine down on top with a gallon filled with water to make sure there was a good seal. When the "tower" is dry cover the weep holes with tape. Try to make it smooth (mine wasn't). You can also cut off the extra glue if you want to.
When you are done taping up the holes you can begin painting it white. Be sure to do this in a well ventilated area.
Let the snowman dry. Give it a second coat of white paint if you can see the base color. After the snowman is totally dry take the black and paint on his face and coal buttons. I used spry paint by spraying it on cardboard first then dipping my brush in. You can use acrylics for this if you would like.
After his face is dry he you can add the hat and scarf and take him outside. I used the landscape staples I made from hangers to secure him to the ground-he is light.
If you want your snowman to have arms cut slits in the sides to shove sticks in.
After his arms are in he is all done. Here is mine sitting in my front flower bed.
This project is super easy and fun to boot. I hope you give this a try! If you have any questions about this project or anything else just leave them in the comment section.
Until Next time-Happy planting!
Rhonda
Just like most of my projects this one is super easy and cheap:-)) For this you will need:
1. 3 nursery pots in different sizes
2. Spray paint-white and black (I use Rustoleum 2 in 1 with primer)
3. A good weather resistant glue (I used Gorilla Glue)
4. Some tape-I used duct tape
5. 2 sticks for arms
6. A hat and scarf
7. A few landscape staples
Begin by gluing your pots together upside down-start with the largest on the bottom, medium in the middle and smallest on top. Follow the manufacturer's directions for your glue.
Let the glue set for the recommended amount of time. I weighted mine down on top with a gallon filled with water to make sure there was a good seal. When the "tower" is dry cover the weep holes with tape. Try to make it smooth (mine wasn't). You can also cut off the extra glue if you want to.
When you are done taping up the holes you can begin painting it white. Be sure to do this in a well ventilated area.
Let the snowman dry. Give it a second coat of white paint if you can see the base color. After the snowman is totally dry take the black and paint on his face and coal buttons. I used spry paint by spraying it on cardboard first then dipping my brush in. You can use acrylics for this if you would like.
After his face is dry he you can add the hat and scarf and take him outside. I used the landscape staples I made from hangers to secure him to the ground-he is light.
If you want your snowman to have arms cut slits in the sides to shove sticks in.
This project is super easy and fun to boot. I hope you give this a try! If you have any questions about this project or anything else just leave them in the comment section.
Until Next time-Happy planting!
Rhonda
Saturday, November 1, 2014
Fall Cleanup of Hosta
| Hosta "Queen Josephine" in spring |
| Hosta "Queen Josephine" in fall |
The first issues I try to prevent are slug and snail problems. Slug and snails can wreak havoc on my Hosta leaves in the spring and summer. I believe removing the leaves in the fall help to reduce their numbers come spring since they can lay their eggs in decaying matter. Removing the foliage makes them move somewhere else to lay their eggs.
Another reason to remove the foliage is foliar nematodes. Nematodes can overwinter in the dead foliage and find their way to your Hosta next spring. Nematodes cause damage to the leaves in the summer and they can spread if not controlled.
Disease control is another reason to remove the dead foliage. Some diseases can make their home in dead and decaying matter. Good housekeeping around your flower beds can help keep problems such as anthracnose and bacterial rot at bay along with a multitude of other disease that may or may not affect your Hosta but do affect your other plants in your garden.
How do I clean up my Hosta? I wait for them to be hit by a freeze and then I go out and pull the dead foliage away from the crown of the Hosta. It should pull right off. I am not a fan of using tools such as pruners for this since disease can be spread that way, and you don't really need them anyway. I also do not compost any of the leaves-my compost does not get hot enough to kill any pests or disease so I send them off with our city since they have a compost facility.
Here are some pics of how to remove the foliage easily:
1. Find a Hosta
2. Grab the foliage with your hand
3. Pull the foliage-it should come off
4. Clean up your leaves and dispose of them
5. All cleaned up and ready for winter
Not all gardeners clean up their Hosta in the fall-some leave the foliage to decompose over the winter. I do not. I prefer to remove the debris and as I said-I really think it does help to reduce the issues that occur with Hosta. If you have pest and disease issues with your Hosta give this a try and maybe next spring you won't have an issue with slugs or with nematodes. You might be surprised at much it helps. I hope you find this post useful and if you have any questions or comments feel free to leave them below:-))
As always-Happy Planting!
Rhonda
Friday, October 31, 2014
DIY Pine Cone Wreath Using Chicken Wire
Every Fall my pine trees gift me with a large amount of pine cones and every year I bag them up and take them to the city compost. Not this year. This year my goal was to use at least some of those pine cones. I did do a few other projects put it didn't put a dent in the piles I have so I decided to try and make a wreath. Of course, I had to do it on the cheap so I used chicken wire instead of a wire wreath form (which would have worked nicely for this). Here is a picture of the end project:
For this project you will need:
1. A length of chicken wire-mine was 4 ft by 1 ft (you can also use a wire wreath frame for this)
2. Pine cones (I used about two-thirds of what is in the plastic tub in the picture below)
3. Nylon Ties (zip ties)
4. Ribbon and any thing you want to decorate the wreath. I used a fake leaf garland I picked up at Dollar Tree.
I started this project by baking my pine cones in the oven at 250 degrees for 1 hour (to kill the bugs). I bake them on aluminum sheets I purchased from Dollar Tree for-that way I can keep reusing them.
After they are baked let them cool and then you need to re-wet them so they close back up. I threw them in a plastic tub and poured water on them-I then stirred them up then removed them. You don't want them to soak in the water. You just want them to get damp. They should close up by the time you get the next step done.
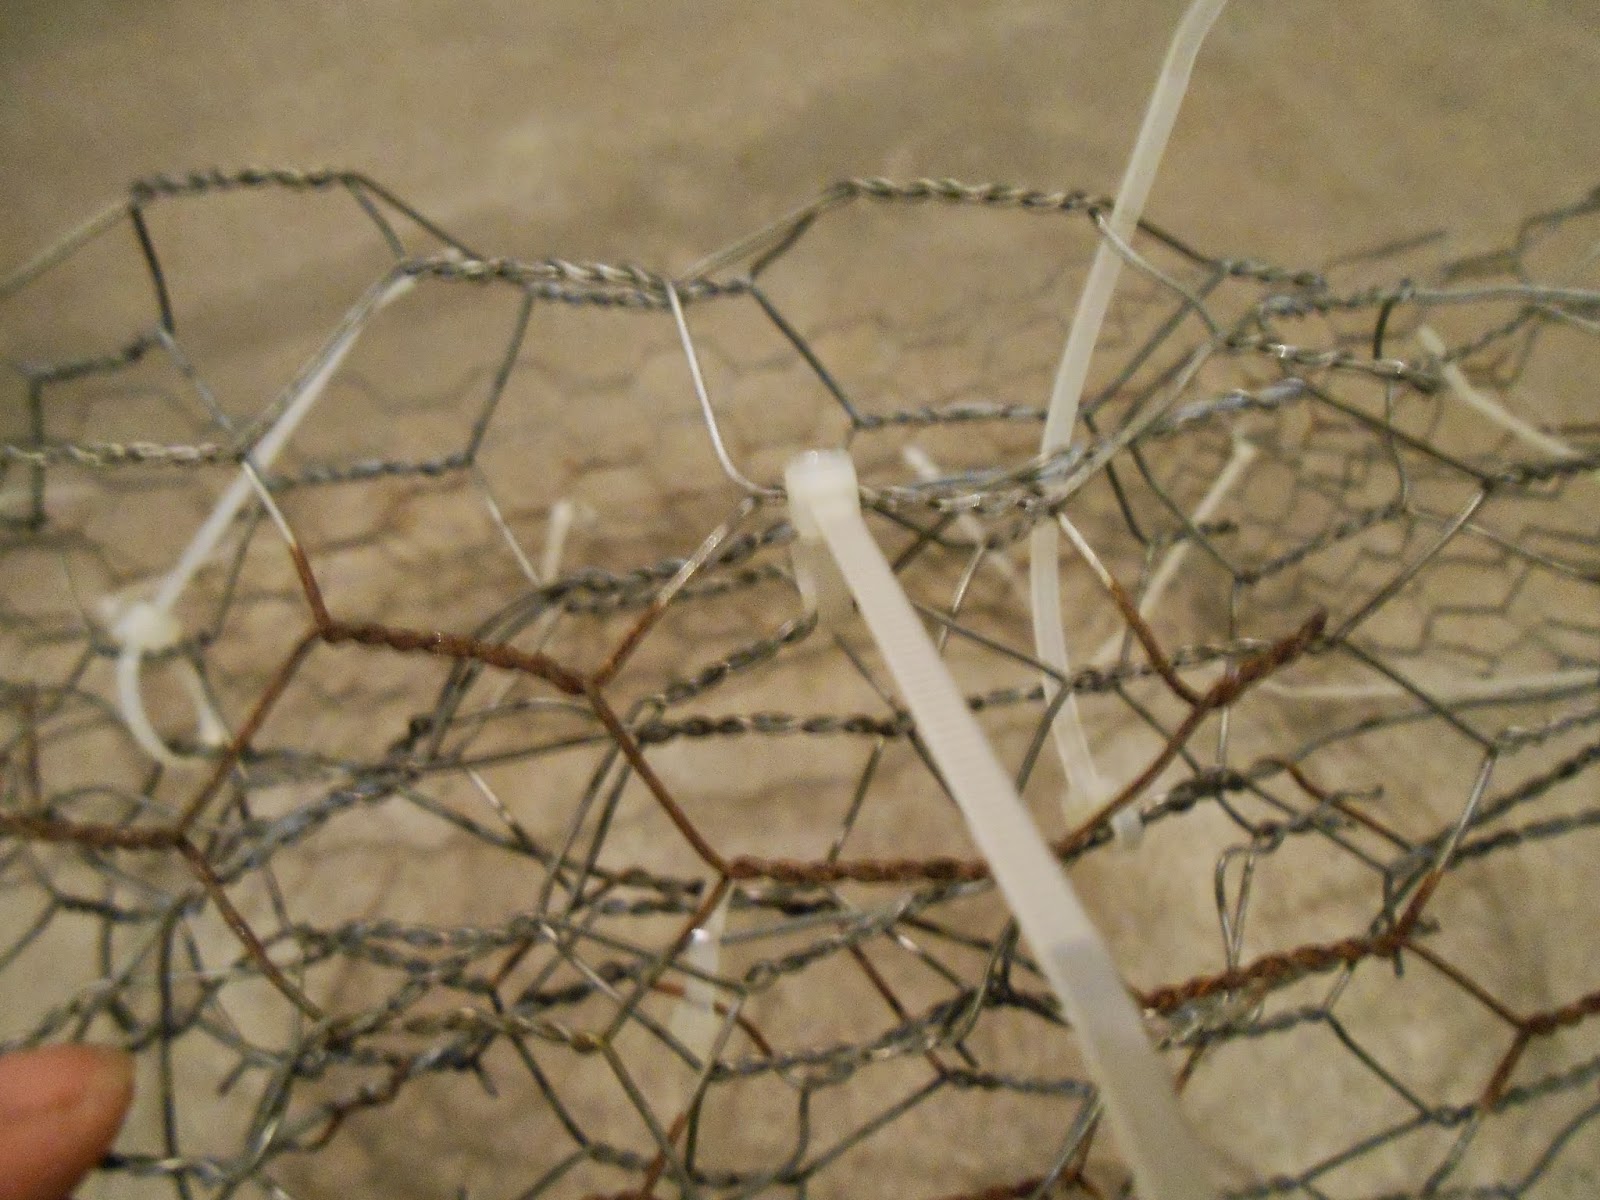
To begin making the wreath lay your chicken wire out flat (as best you can) then roll it up to make a long tube (you might want to wear gloves for this part-chicken wire can be sharp). Hold it in place then take your nylon ties and start securing it like this:
Secure it with a nylon tie every so often (as many as you think it needs to stay in place). It should look like this:
Now "squish" one end of the tube like this:
After you squish one end insert it into the other open end like this:
Secure it together with nylon ties:
It should look similar to this:
It doesn't look like much at this point-don't worry. Trust me:-)) At this point you need to go back and "fluff" up the chicken wire. To "fluff" it just pull it apart gently where it is smashed. You can also give it a more round shape by bending it a little.
We are ready to start adding the pine cones if they are closed up. When they are closed they look like this:
Begin sticking the pine cones in the holes in the chicken wire. You do not need to stick them in too far-just enough so that when they open back up the will be secure. Also remember it is not necessary to do the back of the wreath and also leave a spot to hang the ribbon. I used the area where I connected the two ends of chicken wire together. Here is a pic of a pine cone being inserted. This is about how far they need to go in:
Add as many pine cones as you need for it to be full. Remember the pine cones will expand when they dry and that you can also add pine cones later if you find a bare spot.
Remember to leave a spot empty for the ribbon:
And you don't need to fill the bottom. When the wreath is full of pine cones flip it up and press the chicken wire to flatten it up against the pine cones:
Here is a picture of the wreath with the pine cones in place:
At this point you can play with the wreath to kind of shape it. You can also check for bare spots. I added my fake leaf garland and just weaved it into the front of the wreath and then attached it with the nylon ties:
I then added a ribbon I made-I just attached it with a nylon tie. I am not a ribbon tying kind of girl and it took me a while to get it to look decent:-))
After I added the ribbon I let it dry for a day so that the pine cones would open up all the way. I then checked it for bare spots and added a few more pine cones. Here it is hanging on my wall:
The best part about this wreath is I can change it over to Christmas whenever I feel the urge. All I have to do is take off the bow and leaf garland and replace them. Easy! You can also spray the pine cones with a sealer if you would like-I did not. I like them just the way they are. Just remember to not get the wreath wet or the pine cones will close back up:-))
I hope you give this project a try-it is easy and would be even easier if you use a metal wreath form.
As with all my projects you can give it your own special touches-make it your own:-)) Have fun with it! Until next time-Happy Planting!
Rhonda
For this project you will need:
1. A length of chicken wire-mine was 4 ft by 1 ft (you can also use a wire wreath frame for this)
2. Pine cones (I used about two-thirds of what is in the plastic tub in the picture below)
3. Nylon Ties (zip ties)
4. Ribbon and any thing you want to decorate the wreath. I used a fake leaf garland I picked up at Dollar Tree.
I started this project by baking my pine cones in the oven at 250 degrees for 1 hour (to kill the bugs). I bake them on aluminum sheets I purchased from Dollar Tree for-that way I can keep reusing them.
After they are baked let them cool and then you need to re-wet them so they close back up. I threw them in a plastic tub and poured water on them-I then stirred them up then removed them. You don't want them to soak in the water. You just want them to get damp. They should close up by the time you get the next step done.
To begin making the wreath lay your chicken wire out flat (as best you can) then roll it up to make a long tube (you might want to wear gloves for this part-chicken wire can be sharp). Hold it in place then take your nylon ties and start securing it like this:
Secure it with a nylon tie every so often (as many as you think it needs to stay in place). It should look like this:
Now "squish" one end of the tube like this:
After you squish one end insert it into the other open end like this:
Secure it together with nylon ties:
It should look similar to this:
It doesn't look like much at this point-don't worry. Trust me:-)) At this point you need to go back and "fluff" up the chicken wire. To "fluff" it just pull it apart gently where it is smashed. You can also give it a more round shape by bending it a little.
We are ready to start adding the pine cones if they are closed up. When they are closed they look like this:
Begin sticking the pine cones in the holes in the chicken wire. You do not need to stick them in too far-just enough so that when they open back up the will be secure. Also remember it is not necessary to do the back of the wreath and also leave a spot to hang the ribbon. I used the area where I connected the two ends of chicken wire together. Here is a pic of a pine cone being inserted. This is about how far they need to go in:
Add as many pine cones as you need for it to be full. Remember the pine cones will expand when they dry and that you can also add pine cones later if you find a bare spot.
Remember to leave a spot empty for the ribbon:
And you don't need to fill the bottom. When the wreath is full of pine cones flip it up and press the chicken wire to flatten it up against the pine cones:
Here is a picture of the wreath with the pine cones in place:
At this point you can play with the wreath to kind of shape it. You can also check for bare spots. I added my fake leaf garland and just weaved it into the front of the wreath and then attached it with the nylon ties:
I then added a ribbon I made-I just attached it with a nylon tie. I am not a ribbon tying kind of girl and it took me a while to get it to look decent:-))
After I added the ribbon I let it dry for a day so that the pine cones would open up all the way. I then checked it for bare spots and added a few more pine cones. Here it is hanging on my wall:
I hope you give this project a try-it is easy and would be even easier if you use a metal wreath form.
As with all my projects you can give it your own special touches-make it your own:-)) Have fun with it! Until next time-Happy Planting!
Rhonda
Subscribe to:
Posts (Atom)