Analytics

Sunday, October 18, 2015

DIY Reversible Wooden Scarecrow/Snowman


Do you ever walk in to a store to buy a particular item and end up getting distracted by something else?  I do!  It happens all too often.  In fact, recently I went to my local Menards store to pick up some supplies for a few concrete projects and walked through the wood department.  There sat a pile of cheap wood and I suddenly lost sight of my mission.  At the bargain basement price of 1.69, I now had a new project in mind.  I had been seeing some really neat ideas on Etsy and Pinterest for wooden scarecrow faces-but most didn't have instructions to make them and some were links to buy them-which irritates the heck out of me.  So I grabbed a couple of pieces and headed to the checkout with an idea in my mind-I was going to make one and it will be easy and cheap!


Just like some of my other projects I didn't have to go out and spend a bunch of money and I didn't have to use any power tools.  It is easy and most of the time making it was spent waiting for the paint to dry.   Here are a couple pictures of the end project:  
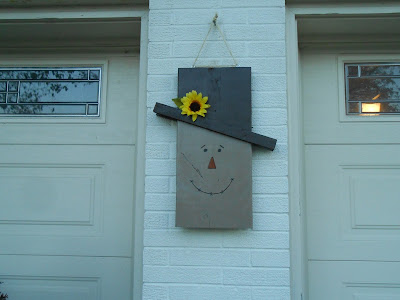
DIY reversible decoration-scarecrow side
DIY Reversible Fall/Winter Decoration-Scarecrow side

DIY reversible decoration-snowman side
DIY Reversible Fall/Winter Decoration-Snowman side

 So here is the wood I used for this project (the 2 small pieces were scrap wood that I had laying around):
Wood pieces used for snowman/scarecrow project
Here is a list of what I used:
1.  A 2x12 piece of wood
2.  2 scrap pieces of 1 1/2 x 18 in
3.  some small nails
4.  A hammer and a staple gun (optional to attach flowers)
5.  some glue-I used Elmer's Glue All
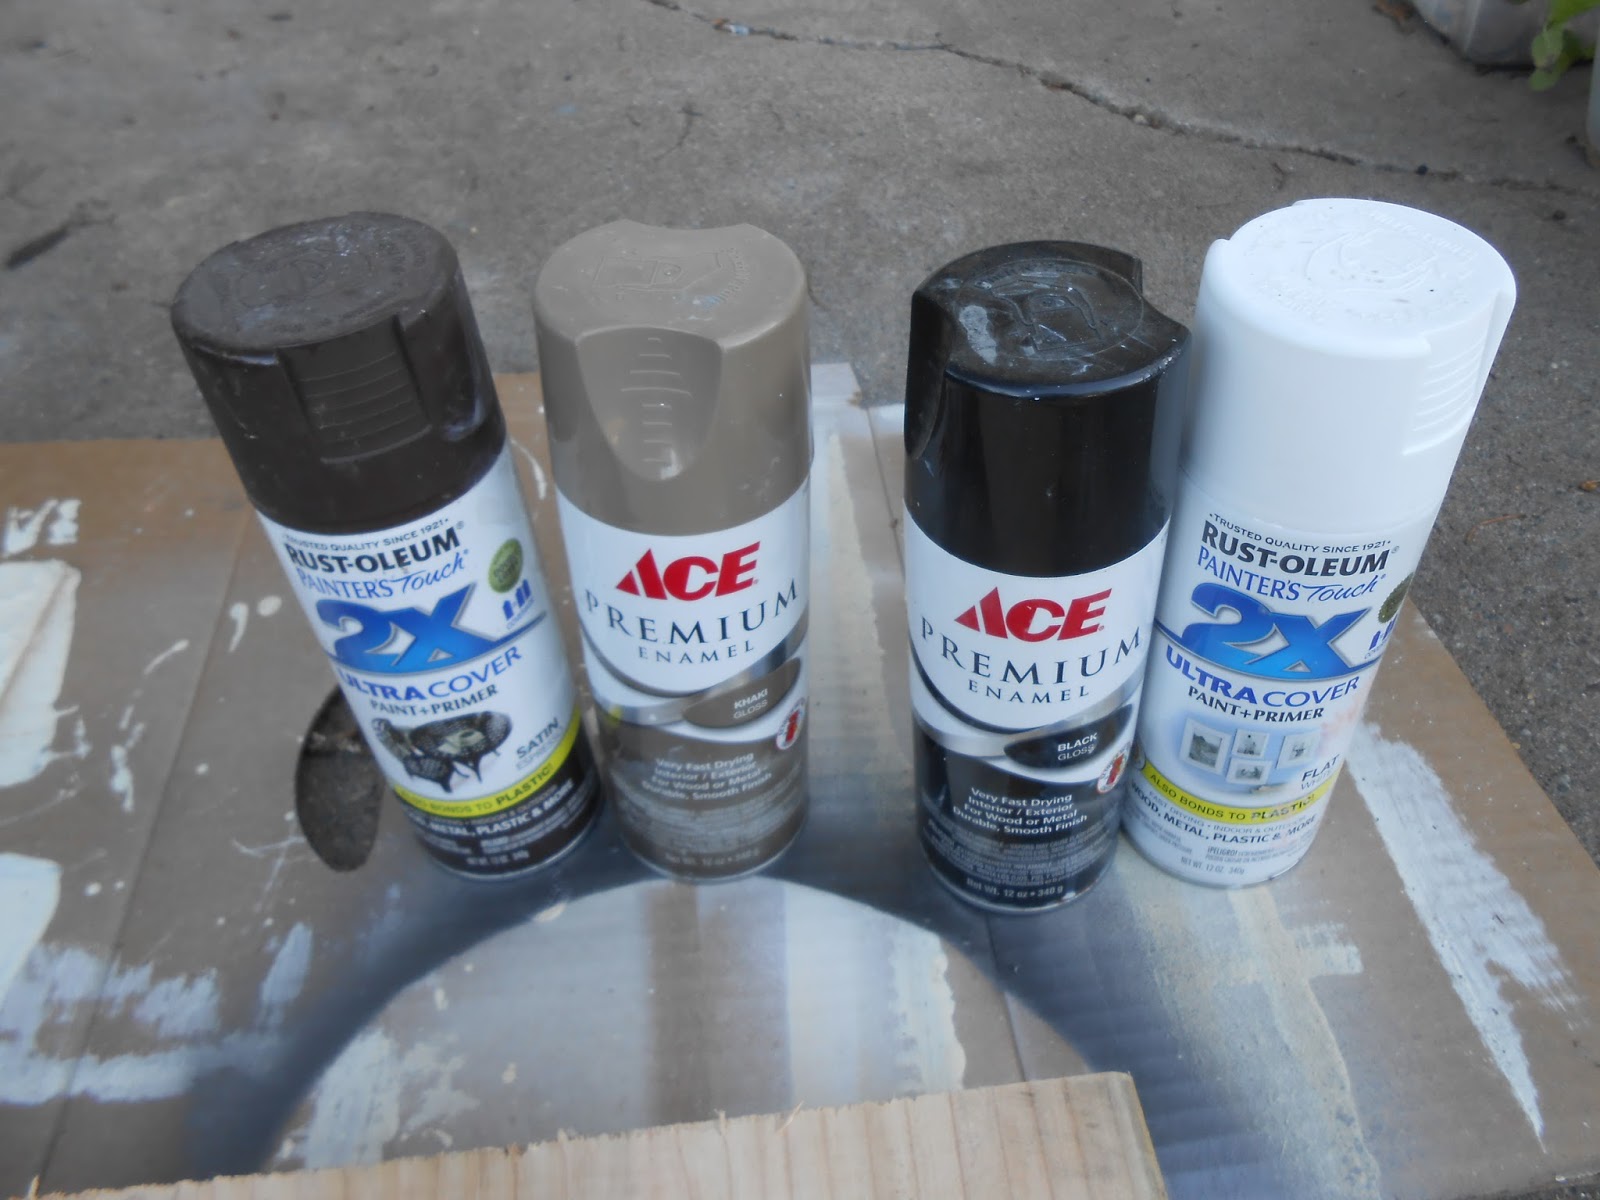
6.  Spray paint-I used black, white, khaki and brown (you can use whatever colors that you want-it is your "art")
7.  a couple of fake flowers-I used 1 poinsettia and 1 sunflower for decoration
8.  paint and small brushes to make the faces
9.  2 small screw eyes
10. some twine

So here are the steps to create your reversible scarecrow/snowman:

1.  Lay your large piece of wood on a piece of cardboard (or plastic) on the ground and line up the smaller wood across the board so that it looks somewhat like a hat brim.  Try to have the same amount of overhang on each side.  I went about a third of the way down and tilted it like this:
 2.  When you have it in a position you like then draw a line-this will guide you when you attach it.
 3.  Now take the glue and run some along the small board-if there is an "ugly" side glue that side:
 Do not go to the edge-only glue where there will be contact with the large piece of wood:
Spread glue evenly

Spread glue evenly
 4.  Place the strip of wood in position (the line you drew earlier) and hammer a nail in place at each end:
Nail down the strips for the hat

 Make sure to hammer the nail down all the way:

 5.  Attach the other strip of wood in the same way-but be sure to line them up with each other so that they are exactly even:
Make sure both sides are even with each other
 6.  Once you have attached the hat brim it is time to paint.  I used spray paint which I already had on hand-but you can use whatever paint you prefer. Tape off the sections if you need to.  I am messy so I always do:-))
Spray paint I used
Paint one section at a time and let dry.  I applied 3 coats of paint.


Snowman side painted
Scarecrow side painted
 7.  When it is painted and the paint is dry you can add the flowers.  I had bought some fake flowers from The Dollar Tree:
Cheap fake flowers for decoration of the hats
 Pull a flower off of the stem and snip the end off so it is flush:
Trim off  plastic tip from fake flower

 place the flower on the hat-I used a pointsettia for the snowman:
Add fake flower


 Staple or nail it down-try to hide the nail or staple:
Staple fake flower down
 Here I used a sunflower for the scarecrow:
 
 8.  Now is the time to draw on/paint a face-I am a terrible artist so this was the worst part for me.   I am so terrible with using a paintbrush that I ended up using Sharpie markers because I was making a mess with the paints.  Here is the scarecrow face side:
Add a face to the scarecrow side
 Here is the snowman side:

Add a face to the snowman side
 9.  Add the screw eyes to the top:
Screw eyes
Screw eyes to hang the wooden decoration
 twist them in good:
Add eye screws
eye screws
 10.  Run the twine through the screw eyes and knot it.  I doubled up my twine to give it strength:
Twine
Twine

Run twine through eye screws
11.  Ready to hang:
DIY wooden reversible scarecrow/snowman
Wooden reversible scarecrow/snowman hanging decoration

DIY wooden reversible scarecrow/snowman decoration
Wooden reversible hanging scarecrow/snowman decoration

See-I told you it was easy!  No special tools or paint needed and you don't need any special artistic skills.  You also don't need to go out and spend 20-30 dollars on a piece of fall decor especially when you can make it yourself.  You can make any adjustments you need to make this work for you.  It is only a guide and/or inspiration to create your own unique piece.  So, give this project a try and make it your own!  I hope you enjoy this post and watch for my next post for another fall/winter project that will also be easy and kinda cool:-))

Until next time-Happy Gardening!

Rhonda 


Wednesday, September 2, 2015

Saving Petunia Seeds

"Wave" Petunias grown from seed

If you read my blog you will notice I have an affinity for seeds.  I love collecting them, storing them,  planting them and even trading them.  There is no greater satisfaction for me as a gardener than growing seeds from my own plants.  Another good reason to collect, save and grow your own is you control the chemicals your plants are exposed to.  Buy Petunias from any Big Box store and you are probably buying plants treated with pesticides or other harmful chemicals that are not good for you, your family or the environment.
Saving seed from most plants is easy-they don't require any special treatment or handling.  There are some that do, however.  Here is a post I did on collecting and saving some of those "special" seeds: http://sproutsandstuff.blogspot.com/2014/12/tips-on-saving-andor-buying-seed-for.html.  You will notice that most of the plants in that post are native woodland plants or ephemerals.  Those seeds do require special saving and handling but most of your common annuals, perennials and biennials don't require anything special.  You just pull them off, dry, clean, and store them until ready to plant-usually the following Spring.  This post will deal with Petunias-they are one of the easiest plants to collect seed from.  One note on seed collecting and growing: unless your plant is non-hybrid it may or may not come true from seed.  An example would be if you have "Purple Wave" Petunias.  You collect seed from those plants and then grow them.  You may or may not get purple.  I myself, have gotten a rainbow of colors when growing this hybrid.  If you are a stickler for color of your flowers then it is best to just buy the seed for the hybrid that you want.  Me, I am not.  I love all the colors and I just love surprises and that is what you get when you grow most plants from seed.  If you are like me and do not care then here is how you collect and save them:
1.  Find yourself a container to hold the seed pods:
Container to hold seed pods

2.  Find a Petunia you would like seeds from.  Look for a plant that is pest and disease free to ensure healthy seeds.  Also make sure there are spent flowers that indicate seed set:
"Wave" Petunias
3.  Locate the dried seed pod or capsule on the plant.  Look for seed pods that are brown and starting to split open.  For Petunias it looks like this:
Petunia seed pod

Petunia seed pod
4.  Snip off the seed pod with your fingernail or a pair of scissors:
Snip seed pod off with nail or scissors

Petunia seed pod
5.  If you want-pull off the green, sticky sepals (leaf like part attached to seed pod).  It is unnecessary to do this-they will dry out eventually.  Sometimes I do, sometimes I don't:-))
Petunia seed pod

Petunia seed pod
6.  Place in your container:
Collected Petunia seed pods
7.  You can leave them in the container (uncovered) for a couple weeks to dry out completely or you can transfer them to a paper plate to dry.  I think they dry faster on the plate.
Petunia seed pods on paper plate to dry
8.  When dry separate the seed from the seed pod.  I usually go through and crush the seed pods with my fingers to release the rest of the seeds:
Crush Petunia seed heads
Crushed Petunia seed head
Crushed Petunia seed pods
9.  After you have crushed all the seed pods you can either pick out all of the "chaffe" (debris) or get a fine sieve and pour the seeds through it onto another plate.
Clean seed with a fine mesh sieve

Clean seed with a fine mesh sieve

Clean seed with a fine mesh sieve
Cleaned Petunia seed
10.  Prepare a seed baggie (either plastic or paper) with the name of the plant and the year and pour the seeds into it and seal it.  Keep in a cool, dry, dark place until you are ready to use them (they do not need to be in the refrigerator!)  All done!  Now you have enough seeds for a thousand plants next year:-)) 
Cleaned Petunia seed

Saved Petunia seed
 So get out there and save some seeds! It is easy, free and fun:-))  You will get so much satisfaction growing plants from your own saved seed or sharing some of your seed with other gardeners.  It is what gardening is all about.

I leave you with one of my favorite quotes on seeds:
"Though I do not believe that a plant will spring up where no seed has been, I have great faith in a seed.  Convince me that you have a seed there, and I am prepared to expect wonders."
-  Henry David Thoreau

If you have any questions or comments about this post (or any post ) feel free to leave them.  So, until next time-Happy Gardening!  Rhonda


Friday, July 10, 2015

Campanula americana-A Native Plant for Shady Gardens

If you were to ask me what the most abundant native plant in my yard is my answer would be Campanula americana.  Then maybe you would ask me why.  Well, I have a few reasons I let this lovely plant grace so much of my backyard every year, and hopefully after you read my reasons for growing this beauty you will also find room in your garden to grow it too.
Campanula americana's unique and beautiful flower
A patch of Campanula americana growing in my garden

So here are the main reasons that I grow this beauty in my garden:

1.  It is a native plant (in my area).

2.  It is a pollinator magnet.

3.  It is easy care and simple to propagate.

4.  It is beautiful.

Have I persuaded you yet?  Maybe not.  I guess I could elaborate more on my reasons-for the sake of argument:-))  So here ya go:

1.  It is native to my area.  Campanula americana is native to much of the Eastern half of the United States and parts of Canada.  It is found growing in woodlands, forest edges, and thickets from moist to dry locations.  It is an adaptable plant and grows well on disturbed sites.  And, as everyone knows, adding natives to your garden is good for nature which leads to the next reason. 

2.  It is a pollinator magnet.  If you are looking to attract pollinators to your yard and garden than this is the plant for you.  Many species of native bees, flies, and wasps seek nectar and pollen from this plant.  If you stand next to it when it is blooming you will see that it is swarmed by many varieties of bees from tiny to large.  Hummingbirds also visit this plant.  In my garden bumblebees spend an enormous amount of time on each individual flower for the nectar.  It is quite a show.
Bee on Campanula americana

Bee on Campanula americana

Bee on Campanula americana

Bee on Campanula americana

3.  Campanula americana is a annual/biennial and is very easy care. It grows in both dry and moist spots in my shade garden.  It will, however, be shorter in the dryer positions.  I have some that are 5 feet tall where it stays moist and in some positions under my pine trees they only get 2-3 feet tall.  Even when they reach a height of 5 feet they usually never need staking-they have a strong stem.  Another bonus is that they do not lean for the light like some taller plants.  They remain upright even at the edge of the shade.  Campanula americana is also easy to propagate-this is usually done from seeds.  You can just let them self sow or you can collect the seed and throw it down wherever you want them to grow.  You can also sow them in pots for planting out later.  I do a combination of all three-this allows me to have plenty growing in different areas rather than having them confined to one area.   I threw these seeds down last fall and they will bloom next summer:
Seedling of Campanula americana-they will bloom next year
These I let sow themselves in this position:

4.  It is beautiful.  The flower and plant are unique and beautiful.  It is also one of the few native woodland flowers to be blooming in the heat of July in my garden.
Campanula americana in my garden

Campanula americana
So, what do you think?  Have I talked you in to adding this plant to your garden?  I sure hope so-it would be a wonderful addition to any shade or part shade garden.   If you are interested you can find seeds for this native beauty at https://www.prairiemoon.com/seeds/wildflowers-forbs/campanula-americana-tall-bellflower.html.

I hope you enjoyed this post on one of my favorite native plants-Campanula american-if you have any questions or comment please feel free to leave them below.

So, until next time-Happy Gardening!

Rhonda