Shame on me-it has been way too long since I posted. I think it is the typing part, I am not the best typist so it seems like it takes me forever to type up one of my posts. I need a secretary:-)) Anyways, I am finally just now typing up one of my projects that I have had finished for a while now. They are garden mushrooms I made using a combination of wood and hypertufa. I think they are cute as can be-but I may be biased. Here is a picture of the finished project:
 |
| Hypertufa and wood garden mushrooms |
|
They are super easy and fun to make and they don't require a ton of money or DIY skills to complete just like my hypertufa garden orbs post:
http://sproutsandstuff.blogspot.com/2014/09/recycle-flat-basketball-to-create.html. Just find yourself some branches or small logs and a few plastic bowls or containers. You might have to go buy the portland cement and perlite-but think of the other cool projects you can make with the rest of the bags! So let's get started!
For this project you will need the following:
1. Some branches or logs that are cut-the size depends on what size mushrooms you want. I used a few different ones.
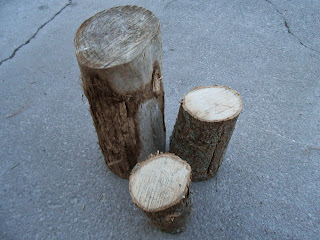 |
| cut logs and branches for stem |
|
2. Find some plastic bowls and containers to match your stump (stem) size wise (if that makes any sense). You need an outer (top) and an inner mold for this. I chose these:
 |
| Molds for mushrooms |
|
Make sure the interior mold (container) fits over the stump like this:
Now match the top (bowl) and middle.
 |
| Molds for hypertufa mushroom tops |
|
3. Portland cement
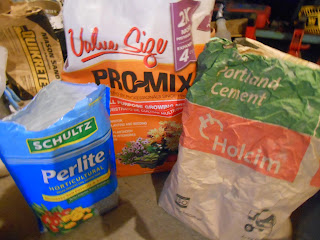 |
| Hypertufa ingredients |
|
4. Perlite
5. Peat moss-I use Pro-Mix All Purpose Growing Mix
6. Fiberglass fibers if you can get them. I purchase them from my local concrete manufacturer.
7. Water
8. Some rubber gloves, dust mask and a good hypertufa recipe-mine is below
9. Cooking spray or mold release spray
Now that we have our supplies we can start creating!
1. Spray your molds with cooking spray and then wipe off. (Do not leave too much on but be sure to cover well).
 |
| Spray molds before filling with hypertufa |
|
2. Mix up your hypertufa in a tub or container.
My recipe using Pro-Mix is as follows (I use a cottage cheese container as a measure):
2 parts Pro-Mix
1 part perlite
1 part portland cement
a pinch or two of fiberglass fibers
water as needed
Another recipe for hypertufa:
1 1/2 peat moss
1 1/2 perlite
1 part portland cement
water as needed
I mix the perlite, peat moss (or Pro-Mix) and fibers first before I add the portland.
Slowly add the water and mix. Do not add too much water-just enough to make it almost like cookie dough. Squeeze some in your hand and if only a few drops of water come out it is done.
I like to ball it up and make sure it stays together when I bounce it on my hand:
When you have reached the needed consistency let the mixture rest (hydrate) for 10 minutes.
3. After the 10 minutes is up you can begin filling your molds. Weigh down the middle with some rocks or sand.
4. Cover with a plastic sheet and let set for at least 24 hours.
 |
| Cover hypertufa with plastic |
|
5. After 24 hours check to see if it has set-press on it and see if it is hard. If it is then you can unmold. If not leave set for another 12-24 hours.
 |
| Unmold hypertufa |
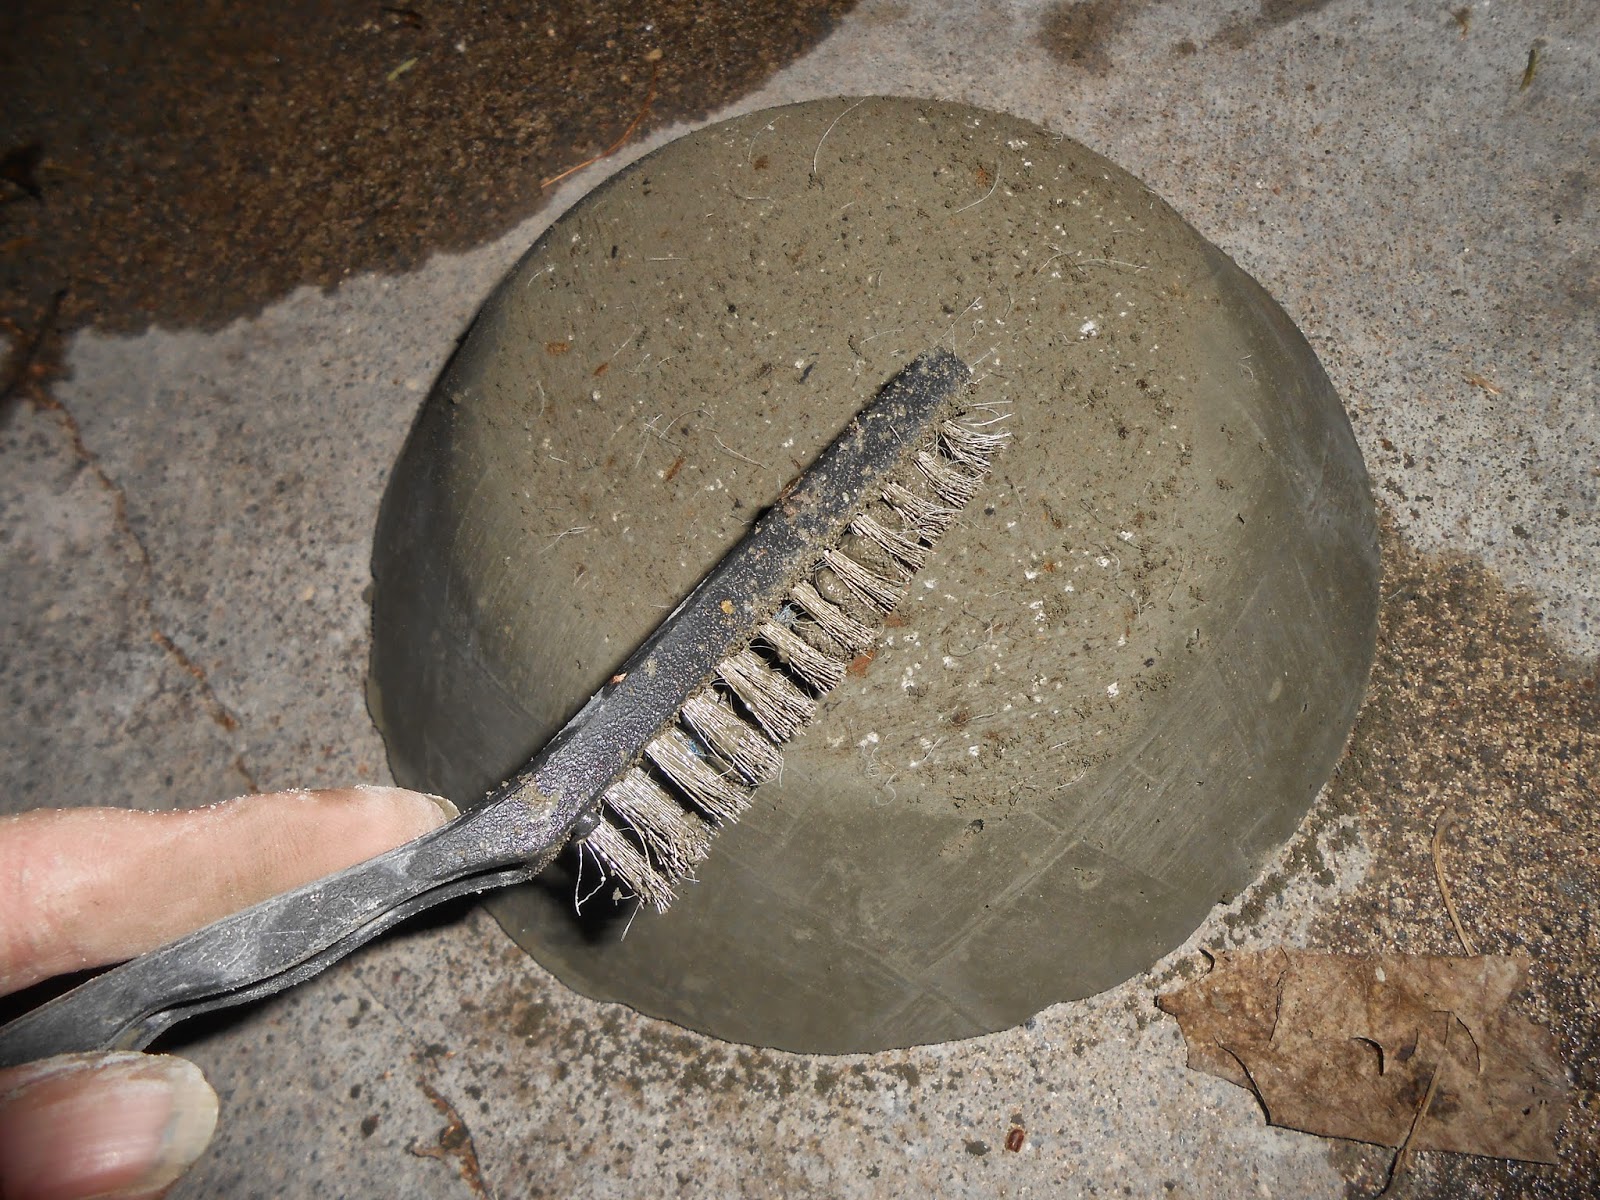
6. If you want a rustic look use a wire brush and scrub the hypertufa so it will have an aged look.
 |
| Brush hypertufa to age |
 |
| Hypertufa mushroom top |
7. Now check the "fit" and look.
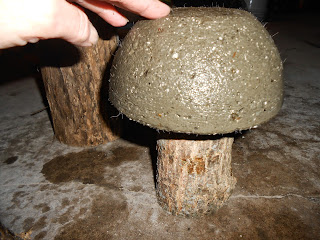 |
| Hypertufa mushroom |
|
8. If everything looks good then it is time for the cure. The cure is how the hypertufa gets it's strength and is going to take at least 7 days. The hypertufa needs to be wet during the cure so either wrap the item in plastic, place in shade and mist a couple times a day to keep it wet or do what I do and that is a water bath. You do this by soaking the hypertufa in water for the cure. Just find a big plastic tote and fill it with water and set the hypertufa in it. Change the water every couple days.
 |
| Concrete or hypertufa water bath |
|
9. While you wait for your hypertufa you need to seal your wood so it won't rot on you. Read the directions on the package. I just use Thompson's Water Seal for mine:
 |
| Seal mushroom stem |
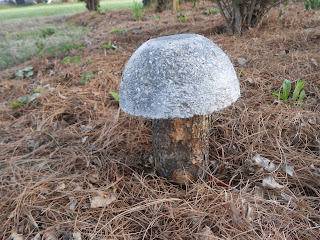
10. After 7 days you can pull your hypertufa out of the water or the plastic and wash it off. Let it dry and then assemble you new hypertufa mushrooms.
 |
| Hypertufa and wood mushrooms in the garden |
 |
| Hypertufa and wood mushroom |
Aren't they just so cute! A wonderful addition to any garden. Just a note-if you have squirrels and other crazy animals you can glue the top to the bottom so they aren't always knocking them off. I learned that the hard way:-)) I hope you give this project or one of my other projects a try. They are all fun and easy to do-just the way I like them. So, until net time-Happy Gardening!
Rhonda


Cool garden craft!
ReplyDeleteThanks-and they are fun to make!
Delete