 |
| Hypertufa garden orb |
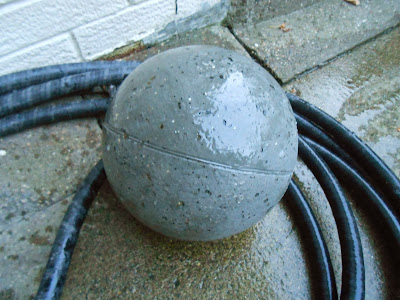
Useless? I think not. They make the perfect mold to create hypertufa garden orbs and better yet they are free. Sure-you can go and buy glass lighting fixtures. But why do that when you can use something free (and safer)?
I use hypertufa for this post but you can use your favorite concrete mix for these. In fact I made a concrete orb with one of the flat basketballs. It is way heavier than the hypertufa. Use which ever you prefer. That is the best part of creating these-you can adjust the directions for your taste and preferences.
For this project you will need:
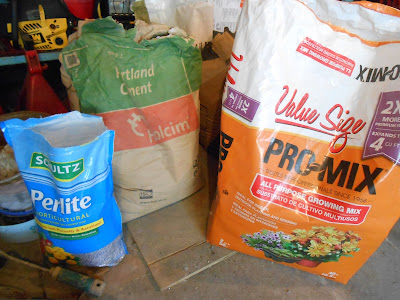
1. Your favorite hypertufa recipe or concrete mix. Also gloves and a mask.
 |
| Hypertufa ingredients |
3. A bowl or container filled with wet sand (to keep the basketball round).
4. An aired up basketball or other round item to make an impression in the sand.
5. A plastic grocery sack to cure the hypertufa orb in.
6. A pair of scissors.
That's it! So now let's get busy creating:-))
1. Using the aired up basketball make an impression in the bowl of sand for the flat basketball to sit in. You want it to be rounded so you don't end up with a flat sided basketball. Unless you don't mind-then you can just leave the sand as is.
2. Look for the fill plug on the basketball and have it facing up like this:
3. Now you are going to take your scissors and cut an opening around the plug. You only need a hole large enough for your hand to fit in. Also leave the flap attached:
5. Begin mixing your hypertufa (or concrete). There are some good recipes online for hypertufa but if you can't find one here is my recipe:
1 part portland cement
1 1/2 parts Pro-Mix All Purpose Growers Mix
1 1/2 part perlite
A handful of concrete reinforcing fibers
You will notice that I use Pro-Mix instead of peat moss. Yes it works-I do not have a need for a bag of peat moss so I use what I have. Pro-Mix works perfectly!
Water as needed
The hypertufa should be about the consistency of oatmeal-when you squeeze a small ball of it in your hand only a few drops of water should come out. Do not add too much water-it will make a weak product! Let your hypertufa sit for about 10 minutes to hydrate before you begin filling.
6. Begin filling your basketball-press the hypertufa down inside the basketball as you fill.
7. After you have filled your basketball let it sit for 24-48 hours. It should begin to harden in 24 hours but I do not unmold for 48 hours.
8. If it has hardened begin cutting the basketball off of the orb. Use sharp scissors:-))
9. After you have "unmolded" the orb you can take a knife and scrape off the excess that is around the fill hole. I use an old steak knife for this. You can also take a wire brush and rough up around the outside of the orb if you would like. I don't do that myself but I know some hypertufa people do it.
Hose it off:
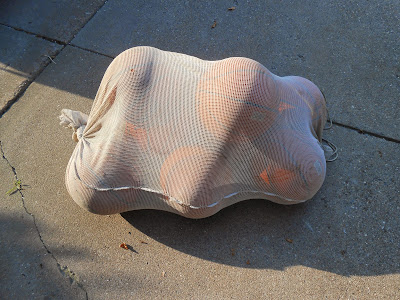
10. Now wrap the orb in the plastic grocery sack and set in the shade for a week or two so that it can cure. Check it daily and mist with water so it doesn't dry out.
 |
| Curing hypertufa |
 |
| Hypertufa garden orb |
 |
| Hypertufa garden orb |
Hope you enjoyed this post and remember to use your own creativity to make it your own. As with all my projects you can change it up for your own taste.
Until next time-Happy Planting!
Rhonda


Cool! I wonder if I threw my basketball away....
ReplyDeleteThank you! Hope you find it! This is a fun project!
DeleteYour hypertufa garden orb is really pretty! After reading your post and reading this hypertufa guide article, I'm pumped up to make a few of my own garden orbs. Wish me luck!
ReplyDeleteShe’s the Paige Bueckers Boyfriend. A basketball phenom, a media darling, and let’s face it, a total mystery off the court. Everyone is naturally interested and asking the big question: who’s Paige Bueckers dating?
ReplyDelete